To get started with Pest v4's new features including browser testing, please refer to the upgrade guide: Upgrade Guide →.
- Browser Testing
- Smoke Testing
- Visual Regression Testing
- Test Sharding
- Type Coverage Is Much Faster
- Profanity Checking
- On Top of PHPUnit 12
Pest v4 Is Here — Now with Browser Testing
Today, we're thrilled to announce the release of Pest v4, bringing the biggest testing upgrade yet: powerful Browser Testing. Pest's new browser testing features let you run elegant, maintainable browser tests — with first-class support for Laravel's testing API and the ability to run tests in parallel. For the first time, this is browser testing that feels as good as writing unit tests.
Here is the creator of Pest, Nuno Maduro, demoing the new browser testing features in Pest v4 at Laracon US:

Here is an example of Browser Testing using Laravel:
1it('may reset the password', function () { 2 // access any laravel testing helpers... 3 Notification::fake(); 4 5 // access to the database — using the RefreshDatabase trait (even sqlite in memory...) 6 $this->actingAs(User::factory()->create()); 7 8 $page = visit('/sign-in') // visit on a real browser... 9 ->on()->mobile() // or ->desktop(), ->tablet(), etc...10 ->inDarkMode(); // or ->inLightMode()11 12 $page->assertSee('Sign In')13 ->click('Forgot Password?')14 ->type('email', 'nuno@laravel.com')15 ->press('Send Reset Link')16 ->assertSee('We have emailed your password reset link!')17 ->assertNoJavascriptErrors(); // or ->assertNoConsoleLogs()18 19 Notification::assertSent(ResetPassword::class);20});With Pest v4's browser testing, you can:
- Seamlessly use Laravel features like
Event::fake(),assertAuthenticated(), and model factories - Use
RefreshDatabase, even with SQLite in-memory databases, to ensure a clean state for each test - Test on multiple browsers (Chrome, Firefox, Safari)
- Test on different devices and viewports (like iPhone 14 Pro, tablets, or custom breakpoints)
- Switch color schemes (light/dark mode)
- Interact with the page (click, type, scroll, select, submit, drag-and-drop, touch gestures, etc.)
- Run parallel browser tests for dramatically faster suites
- Take screenshots or pause tests for debugging
- …all with the elegance of Pest syntax
- Playwright-based — modern, fast, and reliable
To get started with browser testing in Pest, you need to install the Pest Browser Plugin:
1composer require pestphp/pest-plugin-browser --dev2 3npm install playwright@latest4npx playwright installAfter, you may use the visit() function anywhere. Finally, running this test is as simple as executing ./vendor/bin/pest in your terminal. Pest will handle the rest, launching a browser, navigating to the page, and performing the actions you specified.
Smoke Testing
Smoke testing your application in real browsers has never been easier. With Pest v4, you can literally visit all your application pages, and ensure they don't throw any JavaScript errors, and they don't log any console errors.
1$routes = ['/', '/about', '/contact'];2 3visit($routes)->assertNoSmoke();4 5// assertNoSmoke() is a shorthand for:6// - assertNoJavascriptErrors()7// - assertNoConsoleLogs()Visual Regression Testing
Want to ensure your pages look exactly as expected over time? Pest v4 introduces visual regression testing with the assertScreenshotMatches() assertion. This allows you to take screenshots of your pages and compare them against baseline images, ensuring that your UI remains consistent across changes.
1$pages = visit(['/', '/about', '/contact']);2 3$pages->assertScreenshotMatches();This is just a glimpse of what Browser Testing in Pest v4 can do. Find out more about the new features below, and check out the Browser Testing documentation for a complete guide on how to get started.
Test Sharding
Pest v4 introduces Test Sharding, allowing you to split your test suite into smaller, manageable chunks. This is particularly useful for large applications (or when running browser tests) where running all tests at once can be time-consuming.
This feature is particularly useful on CI platforms, where on things like GitHub actions you can no longer scale vertical, but rather horizontally. This means you can run your tests in parallel across multiple machines, significantly speeding up your test suite execution.
To get started with Test Sharding, you can use the --shard option when running Pest:
1# GitHub Workflow One 2./vendor/bin/pest --shard=1/4 3 4# GitHub Workflow Two 5./vendor/bin/pest --shard=2/4 6 7# GitHub Workflow Three 8./vendor/bin/pest --shard=3/4 9 10# GitHub Workflow Four11./vendor/bin/pest --shard=4/4You may combine this with the --parallel option to run your tests in parallel, and this way trully maximize your test suite execution speed:
1./vendor/bin/pest --shard=1/4 --parallelFinally, to easily set up sharding your CI configuration, you just have to ensure each job in your CI configuration runs a different shard of your test suite. For example, in GitHub Actions, you can use the matrix strategy to define multiple jobs that run different shards:
1strategy:2 matrix:3 shard: [1, 2, 3, 4]4 5name: Tests (Shard ${{ matrix.shard }}/4)6 7steps:8 - name: Run tests9 run: pest --parallel --shard ${{ matrix.shard }}/4Type Coverage Is Much Faster
Remember the days when you had to wait for your type coverage to run? Not anymore! Pest v4 introduces a new type coverage engine that is significantly faster than previous versions.
Type coverage is 2x faster on the first run and instant on subsequent runs. This means you can quickly check your type coverage without waiting for long periods, making your development workflow much more efficient.
In addition, Type Coverage now supports Sharding. This means you can run type coverage with the --shard option, just like you do with your tests.
Profanity Checking
Pest v4 introduces a new feature that allows you to check for profanity in your test code. This is particularly useful for maintaining a clean and professional codebase, especially in collaborative environments.
You can enable profanity checking by adding the --profanity option when running Pest:
1./vendor/bin/pest --profanityTo start using Pest's Profanity plugin, you need to require the plugin via Composer.
1composer require pestphp/pest-plugin-profanity --devAfter requiring the plugin, you may utilize the --profanity option to generate a report of your profanity.
1./vendor/bin/pest --profanity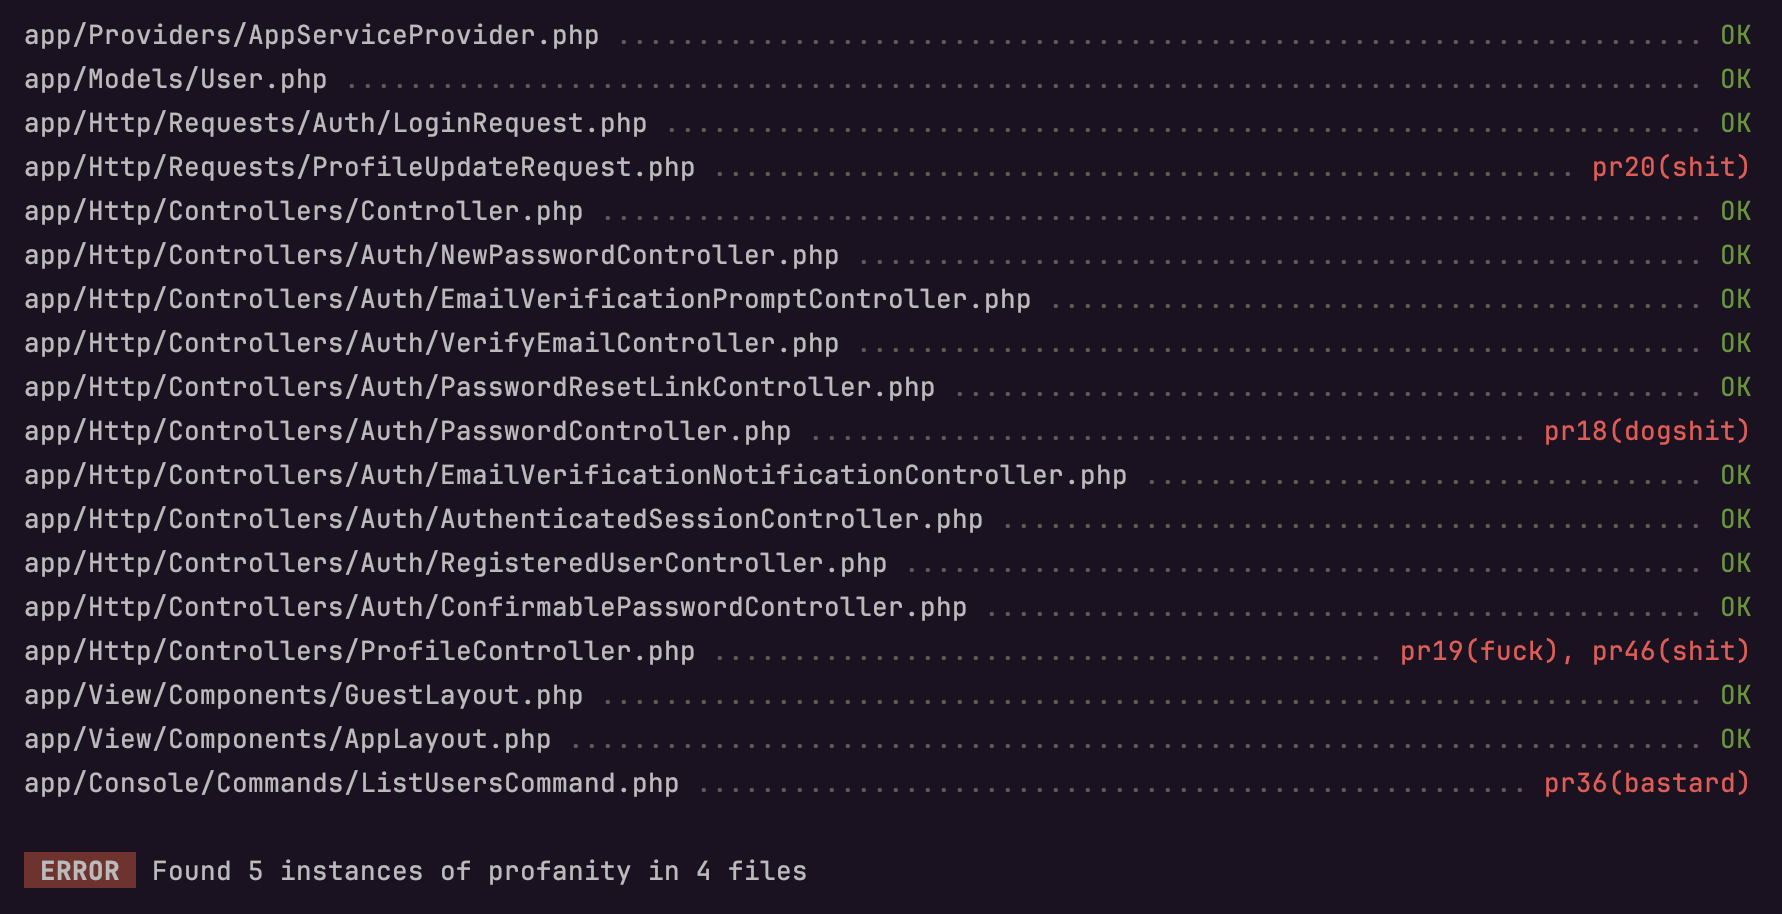
If any of your files contain profanity, they will be highlighted in red and displayed using their respective line numbers and the profane word(s) that have been found.
As an example, pr31(f*ck) means that the word "fuck" was found on line 31.
To learn more about the Profanity plugin and how to configure it, check out the Profanity documentation.
Skip Locally or On CI
Pest v4 introduces the ability to conditionally skip tests based on the environment. You can use skipLocally() to skip tests when running locally, or skipOnCi to skip tests when running on a CI server.
1it('does not run locally', function () {2 // This test will be skipped when running locally3})->skipLocally();4 5it('does not run on CI', function () {6 // This test will be skipped when running on a CI server7})->skipOnCi();Miscellaneous Improvements
- You may now use
skipLocally()orskipOnCito conditionally skip tests based on the environment. - The
not->toHaveSuspiciousCharacters()arch expectation has been added to help you identify potential suspicious characters in your code. This arch expectation is now enabled by default on thephparch preset. This expectation requires theintlPHP extension. - The expectation
toBeSlughas been added to help you validate that a string is a valid slug.
On Top of PHPUnit 12
Pest v4 is built on top of PHPUnit 12, which means you get all the latest features and improvements from PHPUnit. As such, be sure to check out the PHPUnit 12 release announcement.
Thanks To You, Pest v4 Is Here!
There's never been a better time to dive into testing and start using Pest. If you're ready to get started with Pest v4 right away, check out our installation guide for step-by-step instructions. And if you're currently using an earlier version of Pest, we've got you covered with detailed upgrade instructions in our upgrade guide.
Thank you for your continued support and feedback. We can't wait to see what you build with Pest v4!
Thank you for reading about Pest v4's new features! Want to get started with Pest? You can find the installation guide in the next section of the documentation: Installation →