Pest v3 Now Available
Today, we're thrilled to announce the release of Pest 3. As we announced at Laracon US, Pest 3 introduces Mutation Testing, Arch Presets, Team Management, New Configuration API, multiple improvements to Architectural Testing & more.
Check out Pest's creator, Nuno Maduro, live demonstrating what's new in Pest 3:
Below, we'll cover all the juicy details about this release. And as usual, you can find the upgrade guide in our website.
- Mutation Testing: An innovative new technique that introduces small changes to your code to see if your tests catch them.
- Arch Presets: A set of predefined rules that you can use to test your application's architecture.
- Team Management: A new feature that allows you to manage tasks and todos with your team directly from the console.
- Nested Describes: You can now nest describe blocks within other describe blocks.
- New Configuration API: A new configuration API that is more intuitive and easier to use.
- More Architectural Testing Improvements:
toUseStrictEquality,toHaveMethodsDocumented,->not->toHaveProtectedMethods, and more. - And Much More...: Constants in Type Coverage, static analysis improvements, and more.
Mutation Testing
Mutation Testing is an innovative new technique that introduces small changes (mutations) to your code to see if your tests catch them. This ensures you’re testing your application thoroughly, beyond just achieving code coverage and more about the actual quality of the tests. It’s a great way to identify weaknesses in your test suite and improve quality.
To get started with mutation testing, head over to your test file, and be specific about which part of your code your test covers using the covers() function.
1covers(TodoController::class);2 3it('list todos', function () {4 $this->getJson('/todos')->assertStatus(200);5});Then, run Pest PHP with the --mutate option to start mutation testing.
1./vendor/bin/pest --mutate2# or in parallel...3./vendor/bin/pest --mutate --parallelPest will then re-run your tests against "mutated" code and see if the tests are still passing. If a test is still passing against a mutation, it means that the test is not covering that specific part of the code. As, as result, Pest will output the mutation and the diff of the code.
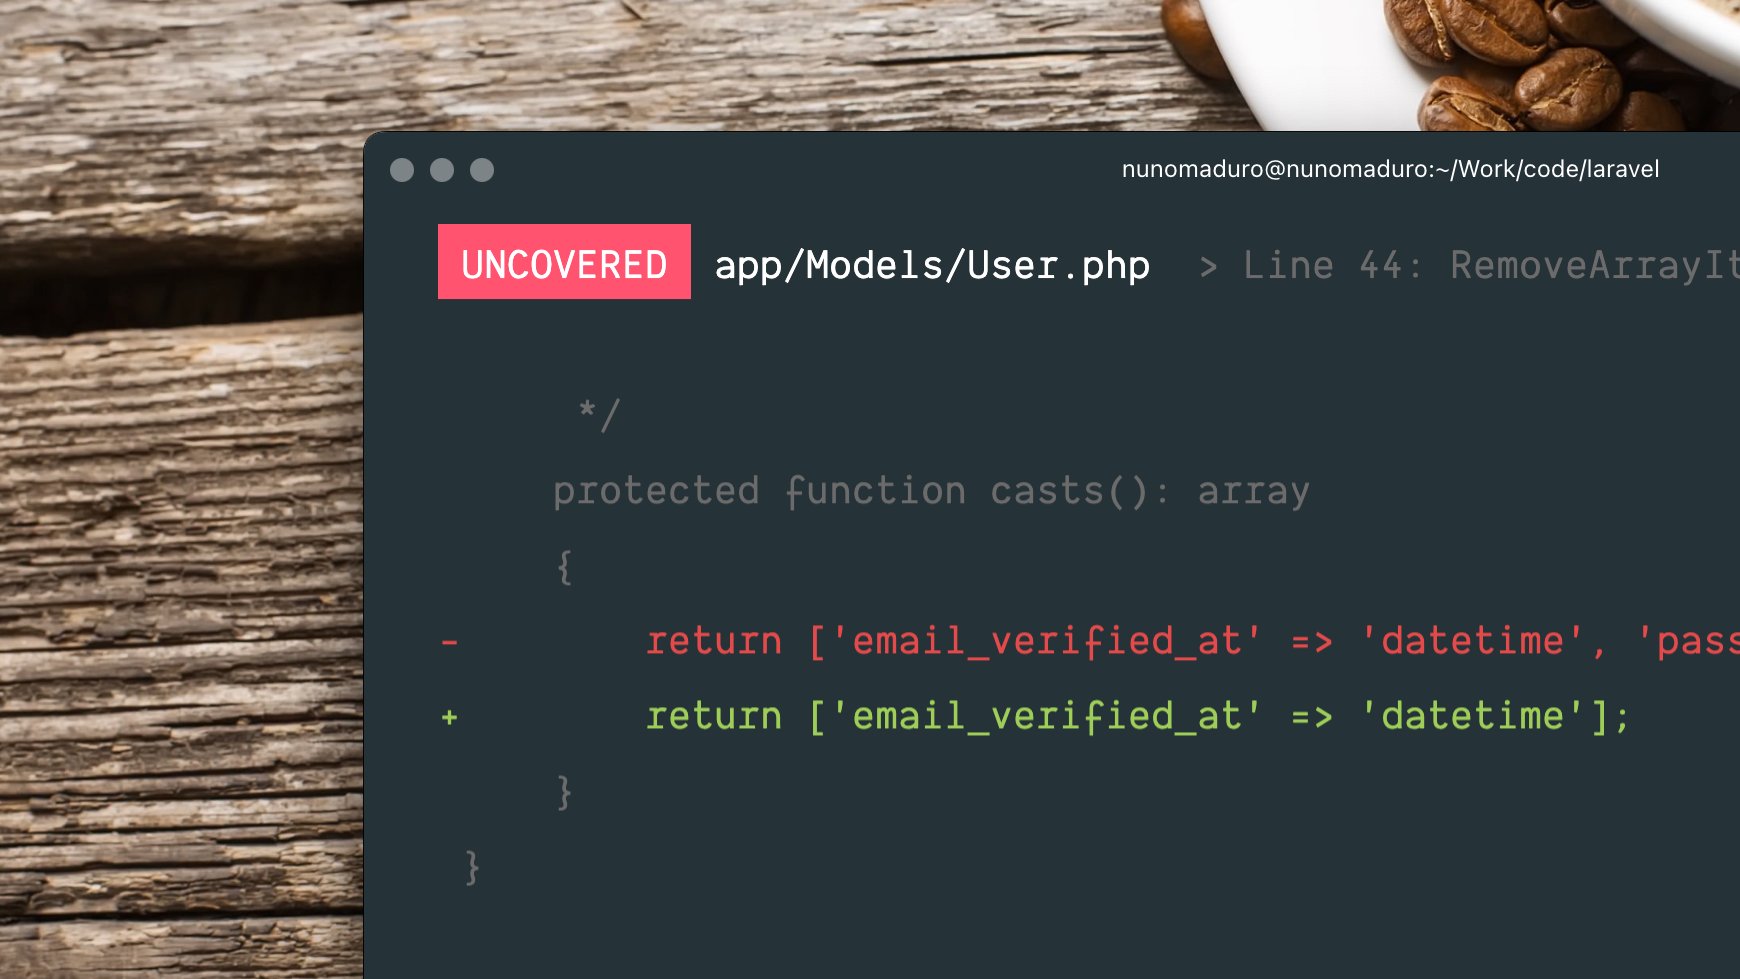
1UNTESTED app/Http/TodoController.php > Line 44: ReturnValue - ID: 76d17ad63bb7c307 2 3class TodoController { 4 public function index(): array 5 { 6 // pest detected that this code is untested because 7 // the test is not covering the return value 8- return Todo::all()->toArray(); 9+ return [];10 }11}12 13 Mutations: 1 untested14 Score: 33.44%Once you have identified the untested code, you can write additional tests to cover it.
1covers(TodoController::class);2 3it('list todos', function () {4+ Todo::factory()->create(['name' => 'Buy milk']);5 6- $this->getJson('/todos')->assertStatus(200);7+ $this->getJson('/todos')->assertStatus(200)->assertJson([['name' => 'Buy milk']]);8});Then, you can re-run Pest with the --mutate option to see if the mutation is now "tested" and covered.
1Mutations: 1 tested2Score: 100.00%The higher the mutation score, the better your test suite is. A mutation score of 100% means that all mutations were "tested", which is the goal of mutation testing.
Now, if you see "untested" or "uncovered" mutations, or are a mutation score below 100%, typically means that you have missing tests or that your tests are not covering all the edge cases.
Our plugin is deeply integrated into Pest PHP. So, each time a mutation is introduced, Pest PHP will:
- Only run the tests covering the mutated code to speed up the process.
- Cache as much as possible to speed up the process on subsequent runs.
- If enabled, use parallel execution to run multiple tests in parallel to speed up the process.
There is so much more to explore with Mutation Testing, like @pest-mutate-ignore or --mutate --everything. You can learn more about it in our Mutation Testing section.
Arch Presets
As you may know, Architecture testing enables you to specify expectations that test whether your application adheres to a set of architectural rules, helping you maintain a clean and sustainable codebase.
It's one of the most popular features of Pest, and with Pest 3, we're introducing Arch Presets. Arch Presets are a set of predefined architectural rules that you can use to test your application's architecture. These presets are designed to help you get started with architecture testing quickly and easily.

Here are the available Arch Presets in Pest 3:
php
The php preset is a predefined set of expectations that can be used on any php project. It's not coupled with any framework or library.
It avoids the usage of die, var_dump, and similar functions, and ensures you are not using deprecated PHP functions. source code
1arch()->preset()->php();security
The security preset is a predefined set of expectations that can be used on any php project. It's not coupled with any framework or library.
It ensures you are not using code that could lead to security vulnerabilities, such as eval, md5, and similar functions. source code
1arch()->preset()->security();laravel
The laravel preset is a predefined set of expectations that can be used on Laravel projects.
It ensures you project's structure is following the well-known Laravel conventions, such as controllers only have index, show, create, store, edit, update, destroy as public methods and are always suffixed with Controller and so on. source code
1arch()->preset()->laravel();strict
The strict preset is a predefined set of expectations that can be used on any php project. It's not coupled with any framework or library.
It ensures you are using strict types in all your files, that all your classes are final, and more. source code
1arch()->preset()->strict();relaxed
The relaxed preset is a predefined set of expectations that can be used on any php project. It's not coupled with any framework or library.
It is the opposite of the strict preset, ensuring you are not using strict types in all your files, that all your classes are not final, and more. source code
1arch()->preset()->relaxed();Just like regular architecture tests, you may ignore specific expectation targets using the ignoring() method.
1arch()->preset()->security()->ignoring('md5');2 3arch()->preset()->laravel()->ignoring(User::class);To get started with Arch Presets, please refer to our Architecture Testing section.
Team Management
Pest 3 also introduces Team Management, a new feature that allows you to manage tasks and todos with your team directly from the console. With Team Management, you can create, assign, and track tasks, as well as view the status of each task.
To get started with team management in Pest, you need to specify the project's URL in your Pest.php configuration file. This URL will be used to link todos to the corresponding project management system.
1pest()->project()->github('my-organization/my-repository');If you are using a different version control system, you can use the gitlab, bitbucket, jira, or custom methods instead.
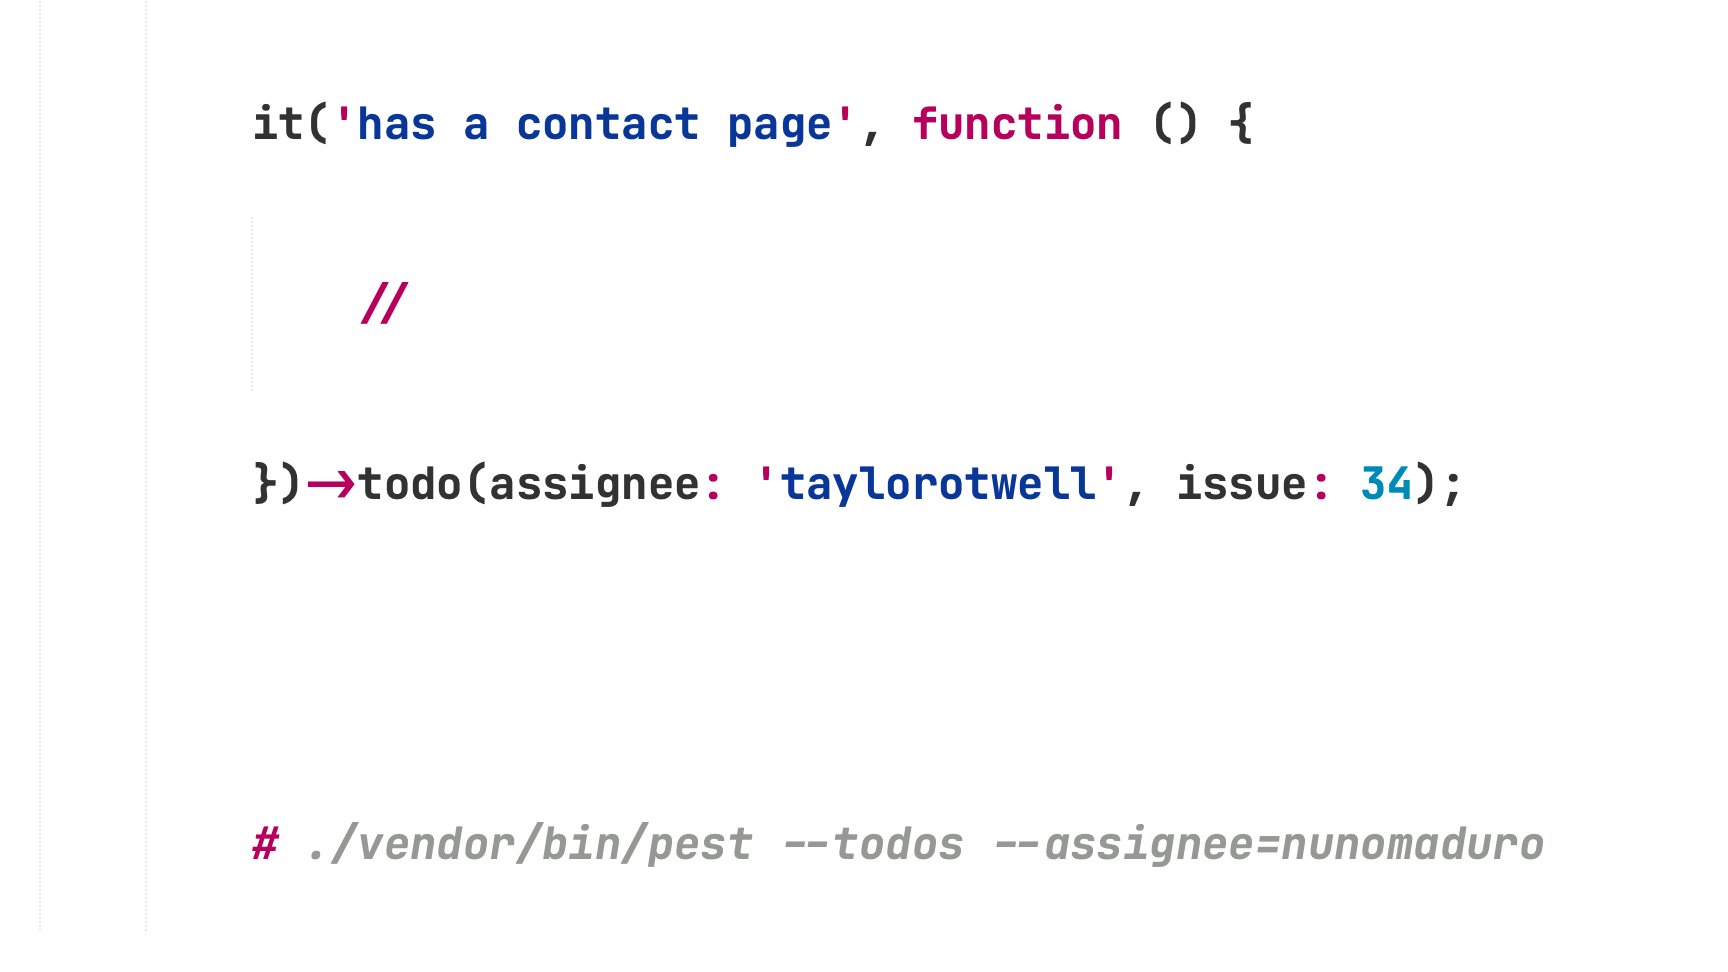
Finally, you can create todos by using the todo() method. Also, you may use the assignee, issue, arguments to assign todos to specific team members or link them to issues in your project management system.
1it('has a contact page', function () {2 //3})->todo(assignee: 'taylor@laravel.com', issue: 123);Also, it is often helpful to provide additional context for a todo. Pest allows you to write notes for a todo by providing a string to the note argument of the todo() method.
1it('has a contact page', function () {2 //3})->todo(note: <<<NOTE4 Given I am a user5 When I visit the contact page6 Then I should see a contact form7NOTE);Once a todo is completed, you can mark it as work in progress by using the wip() method or mark it as done by using the done() method.
1it('has a contact page', function () {2 //3})->wip(assignee: 'taylor@laravel.com', issue: 123); // or ->done()Finally, you can view todos separately from the rest of your test suite by including the --todos option when running Pest. You can also filter todos by assignee by providing their name to the --assignee option, or filter todos by issue by providing the issue number to the --issue option.
1./vendor/bin/pest --todos --assignee=taylor # or --issue=123There is so much more to explore with Team Management, you can learn more about it in our Team Management section.
Nested Describes
In Pest 3, you can now nest describe blocks within other describe blocks. This allows you to group tests more effectively and keep your test suite organized.
1describe('home', function () { 2 beforeEach(function () { 3 // 4 }); 5 6 it('can be visited', function () { 7 // 8 }); 9 10 describe('footer', function () {11 it('contains a link to the contact page', function () {12 //13 });14 });15});New Configuration API
Pest 1 / Pest 2's configuration API was a little bit confusing, the uses() function that was originally made only for having the $this variable within closure bound to the test case instance, ended up being used for pretty much everything.
In Pest 3, we've introduced a new configuration API that is more intuitive and easier to use. The new configuration API is based on the pest() function, which allows you to configure Pest using a fluent and expressive API.
Note: the
uses()function is still available in Pest 3, and we don't have plans to remove it. However, we recommend using the new configuration API for new projects.
1-uses(TestCase::class)->in(__DIR__);2+pest()->extends(TestCase::class);3 4-uses(TestCase::class, RefreshDatabase::class)->in('Features');5+pest()->extends(TestCase::class)->use(RefreshDatabase::class)->in('Features');6 7-uses()->compact();8+pest()->printer()->compact();And of course, any method that was available on the uses() API, like ->beforeEach() or ->group() is still available on the new pest() configuration API; we've just made it more intuitive and easier to use.
More Architectural Testing Improvements
New Expectations
Again, Pest comes with a bunch of new architectural expectations and improvements. Some of them are already being used in the new Arch Presets, but you can use them individually as well.
toUseStrictEquality()- Asserts that a target uses strict equality.===instead of==.toHaveMethodsDocumented()- Asserts that a class has all its methods documented.toHavePropertiesDocumented()- Asserts that a class has all its properties documented.toHaveFileSystemPermissions()- Asserts that a file has the expected file system permissions.toHaveLineCountLessThan- Asserts that a file has less than a given number of lines.toHaveMethods()- Asserts that a class has the expected methods.not->toHavePrivateMethodsBesides()- Asserts a class only "allows" the given private methods.not->toHavePrivateMethods()- Asserts that a class does not have private methods.not->toHaveProtectedMethodsBesides()- Asserts a class only "allows" the given protected methods.not->toHaveProtectedMethods()- Asserts that a class does not have protected methods.not->toHavePublicMethodsBesides()- Asserts a class only "allows" the given public methods.not->toHavePublicMethods()- Asserts that a class does not have public methods.toUseTrait()- Asserts that a class uses the given trait.toUseTraits()- Asserts that a class uses the given traits.
You may check all existing architectural expectations in our Architecture Testing section.
Tear Down Improvements
As you may know, Pest allows you to run a specific "teardown" callback after each test using the afterEach() method. This is useful for cleaning up resources or resetting state between tests.
1afterEach(function () {2 // This will run after each test...3});In Pest 3, we've introduced a new after() method that allows you to run a specific "teardown" callback after a specific test or group of tests using describe.
1it('may list todos', function () {2 //3})->after(function () {4 // This will run after this test only...5});To read more about hooks, please refer to our Hooks section.
Miscellaneous Improvements
Because Pest 3 is based on PHPUnit 11, you can now use any PHPUnit 11 feature within Pest. Also, Pest 3 also comes with a bunch minor bug-fixes and improvements, below are some of the them:
- FEAT: Type Coverage now checks for missing types on constants.
- FEAT: Better error messages when static closures are used on tests + wrong arguments on datasets.
- FEAT: Adds basic support for static analysis tools within test closures.
- FEAT: Overall static analysis improvements on expectations and the entire API surface.
- FEAT: Possibility of deleting the
phpunit.xmlfile and having Pest working out of the box. - FIX: Exit code being computed incorrectly when using
--fail-on-xxxCLI options. - FIX: Describe blocks now support more than one method call when chaining methods.
- FIX: Runtime exceptions before the first test are now caught and displayed.
- FIX: Having coverage report failing with
--min=100option when result less than 100 but bigger than 99.5. - And much more...
There's never been a better time to dive in into testing and start using Pest. If you're ready to get started with Pest 3 right away, check out our installation guide for step-by-step instructions. And if you're currently using Pest 2, we've got you covered with detailed upgrade instructions in our upgrade guide.
Thank you for your continued support and feedback. We can't wait to see what you build with Pest 3!
Thank you for reading about Pest 3.0's new features! If you're considering a testing framework for your next project, here's why you should give Pest a try: Why Pest →